As you might know if you’ve read any of our recent posts, one of our missions here on this beautiful piece of property in Uvita, Costa Rica has been to repurpose and recycle wood and roofing material from the old “rancho” that fell on the property two days after we arrived (that’s another story). But another mission was to create a new garden space. So, we set about using some of those old materials to accomplish that second mission and, in this article, I’ll outline how to upcycle a raised garden bed using recycled materials that might already by lying around on your property!
Side note: Please take some time to learn about us and understand why we’ve created this site. We are always on the lookout for new opportunities and we believe in the power of win-win situations to improve life on this planet for all! Please don’t hesitate to Contact Us if you have any questions or want to talk about how our future plans may align.
Step 1: Create a Frame

The first thing we had to do was to create the frame for the raised bed. Unlike our earlier hügelkultur experiments, we wanted a more clearly defined raised bed this time around. So, I decided on a frame of roughly 9 feet long and 3 feet wide. Those dimensions were largely dictated by the availability of leftover wood on the property.
In addition to the length and width dimensions, I wanted the eventual finished product to sit just below hip height so that you didn’t have to fold over to tend to the plants inside of it. Because of this desire, I decided on a height of roughly 42 inches. The idea was that the vertical posts could then sink 6 inches into the ground and the top of the bed would still sit at three feet.
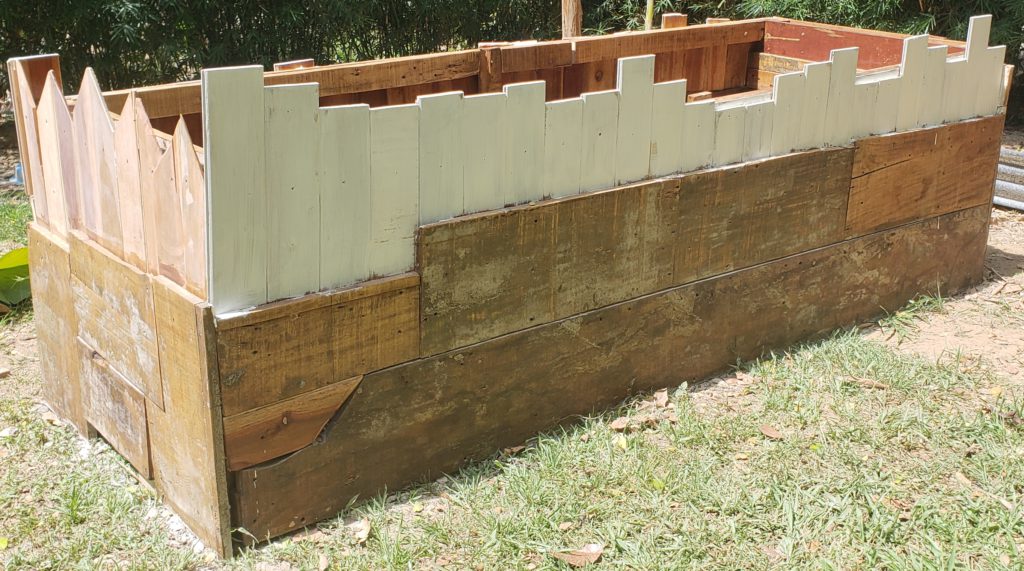
So, I cut six vertical posts to that 42-inch length and then found three 9-foot boards to connect the three vertical posts on either side of the bed. Once I had those two sides in place, I connected them on the ends with three horizontal boards roughly 36 inches long. This created the rectangular framework that you see above.
Step 2: Secure Frame in Place
After the framework was in place, we decided to secure it in our preferred spot before adding any more weight to the total structure. To do this, we dug holes roughly six inches deep at each of the locations of the vertical posts. We then dropped the vertical posts into the holes and did our best to level the entire framework before filling in the holes and spraying them down with a bit of water to get the dirt to turn back into the convenient clay that we had to break up to dig the holes in the first place.
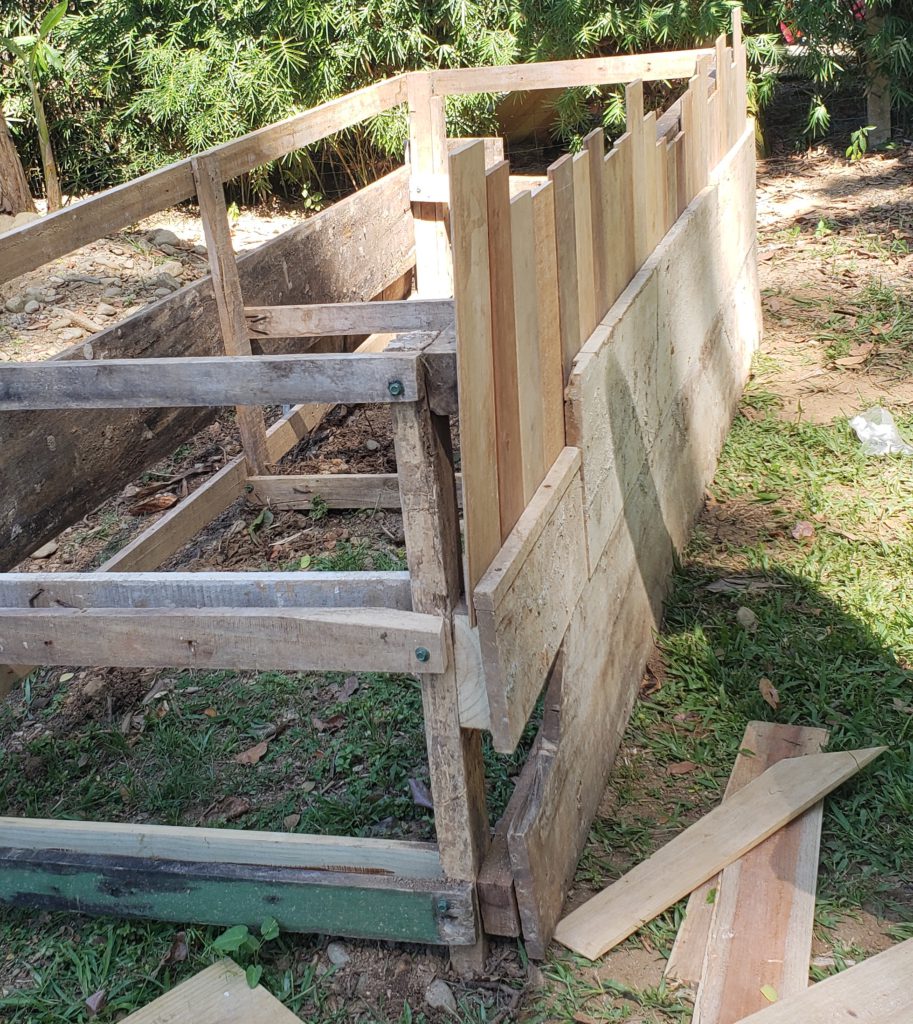
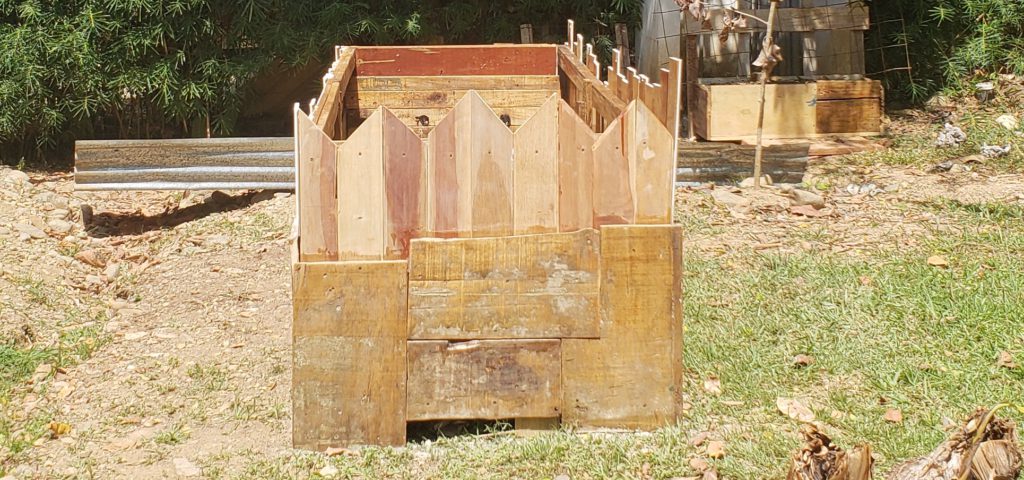
Step 3: Add Siding
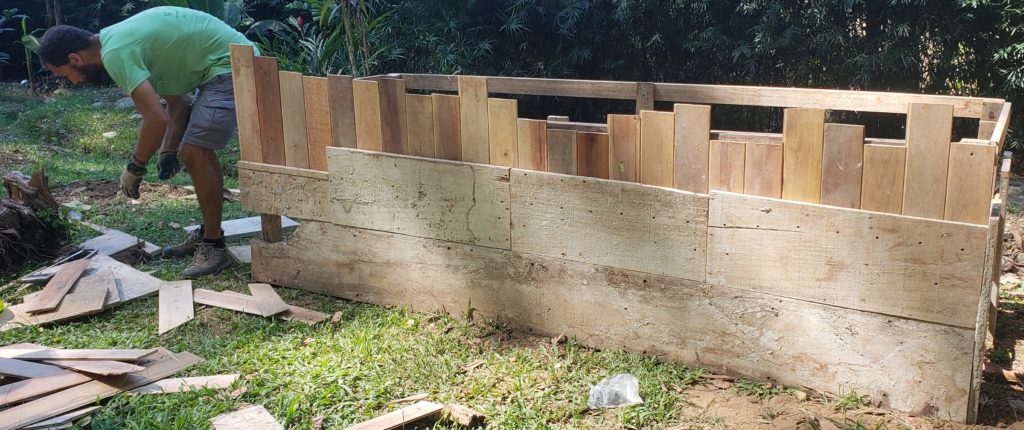
After we were content with the frame being secured in place, we set about adding the exterior siding that would serve to hold everything in place when we started to fill it. With our goal being to use the hügelkultur method to get rid of some of our yard waste, we knew the structure had to be sound. Because of the abundance of wood on the property, quantity wasn’t an issue, but we had to be picky when it came to quality.
At this point, we were largely working with wood scraps of a lot of different shapes and sizes, so we had to get creative to kind of piece things together. As you can see from the photos, some of the wood we chose was in better condition than other pieces, but if you could see what we didn’t use, then our choices would probably make more sense.
Either way you slice it, we didn’t move on until the entire framework was boxed in and we were confident that everything we put inside would, indeed, stay inside. We added the long, horizontal pieces of old zinc roofing to give the exterior a more rustic industrial design feel. And…we also just wanted to reuse them!
Step 4: Paint and Varnish
But before we started to fill it, we wanted to make sure that we did what we could to maximize the life of the already older wood we upcycled for the project. This required sanding the entire framework and siding both inside and out. Fortunately, we were able to borrow an electrical sander from our neighbors for this part of the project, but there were still many nooks and crannies that required hand sanding.
Once the entire structure was sanded, we applied a healthy coat of varnish to the entire interior of the structure. The bottom half of the exterior also received a coat of varnish. For the upper half, we elected for a coat of white, oil-based paint to give the entire structure a sort of “white picket fence” appearance.
The idea of the varnish/paint is that it protects the wood from rain (which there’s quite a bit of here in Costa Rica during the right season) and pests. A lot of the old wood on the property had been eaten away by termites, ants, and other insects. Because the wood on the interior of the garden bed would be exposed to the decaying materials at the bottom of the hügelkultur pile, we wanted to do what we could to make sure they could withstand this exposure for as long as possible.
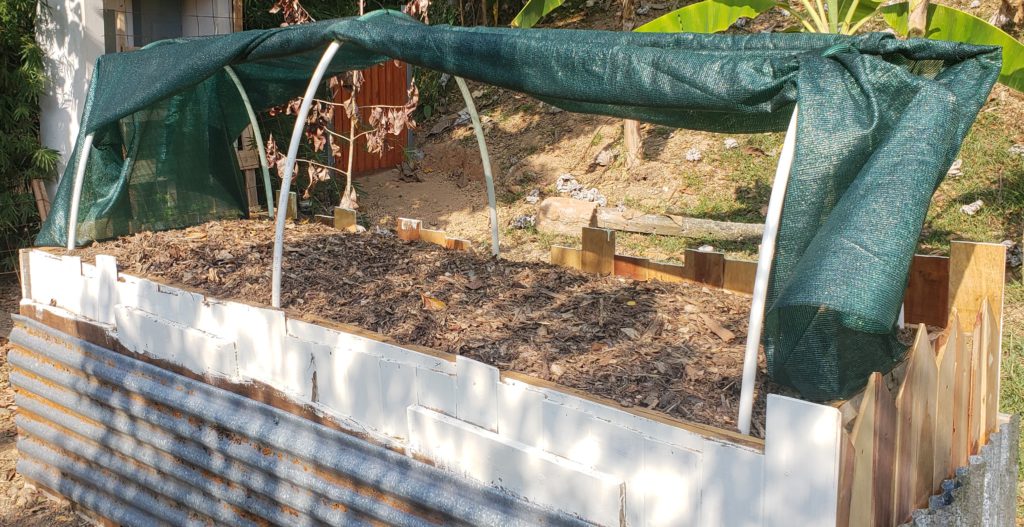
Step 5: Fill It In
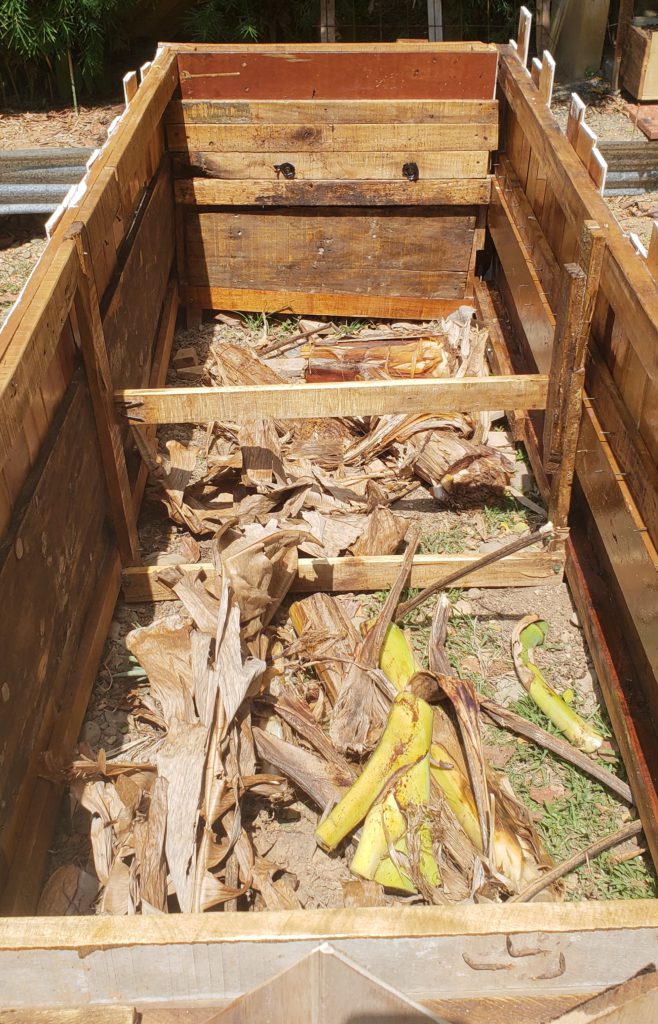
Once we had the entire interior of the raised garden bed painted, we could begin placing some of our hügelkultur materials inside of it. This included old plantain stalks, bamboo cuttings, and lots of leaves from the many cecropias and other trees on the property. If you’re unfamiliar with the hügelkultur method, I’d recommend checking out our other article that describes How to Hügelkultur!
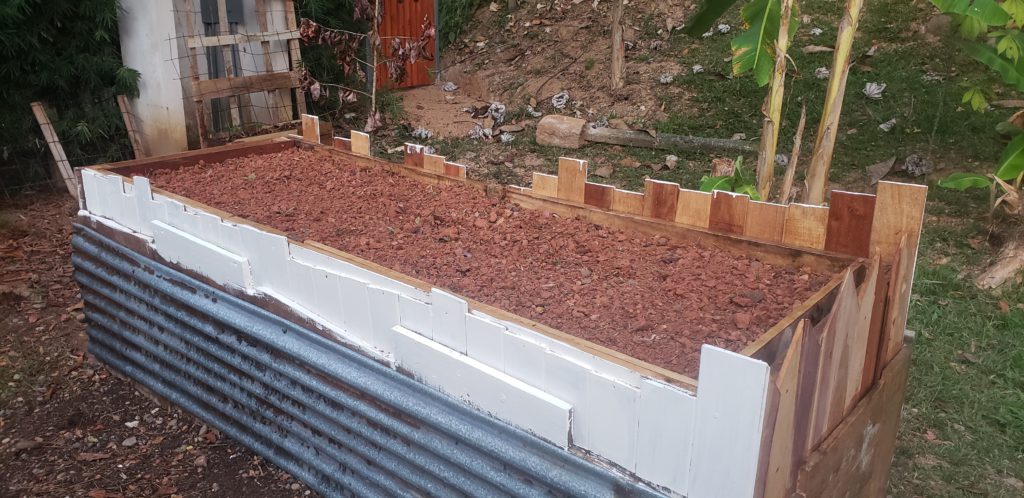
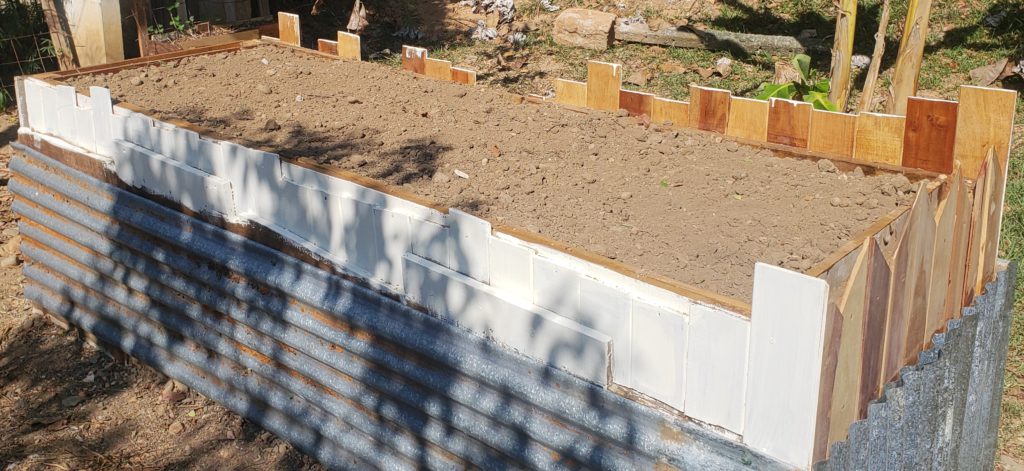
After we put the larger chunks of yard waste and cutting in the bottom of the raised bed, I added about 10 wheelbarrow loads of dirt from another part of the property. My goal was to fill the raised bed all the way up to the brim because I knew that it would settle as the larger debris at the bottom broke down. After the 10 wheelbarrow loads of dirt, we began sifting fertilizer out of our compost shed here on the property. If you want to know how we build that shed, check out this post!
The sifting process was simple. We just wanted to separate the bigger chunks of brown waste and food scraps that hadn’t quite decomposed yet from the dirt that was ready to be repurposed for our gardens. It took about 6 more wheelbarrow loads to fill the entire raised garden bed up to the brim.
Finally, we placed a 1-2 inch thick layer of mulch (which we got from the remainders of what we sifted out of the compost) to protect the soil from the sun.
Update: After almost a month, the soil in the raised bed has settled by more than six inches. When trying this technique, I highly recommend overfilling and allowing one to two weeks for things to settle before planting it!
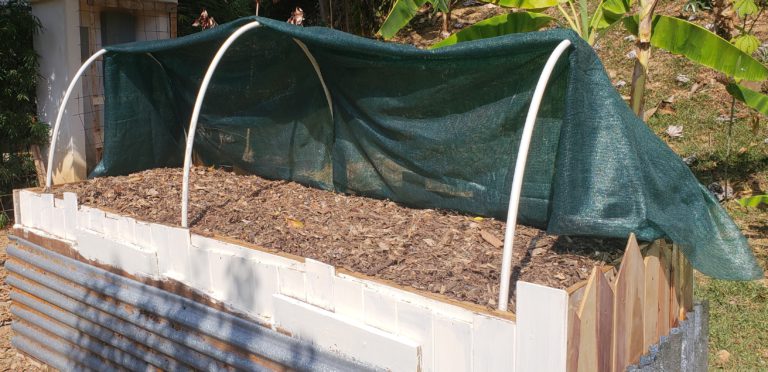
Step 6: Cover It
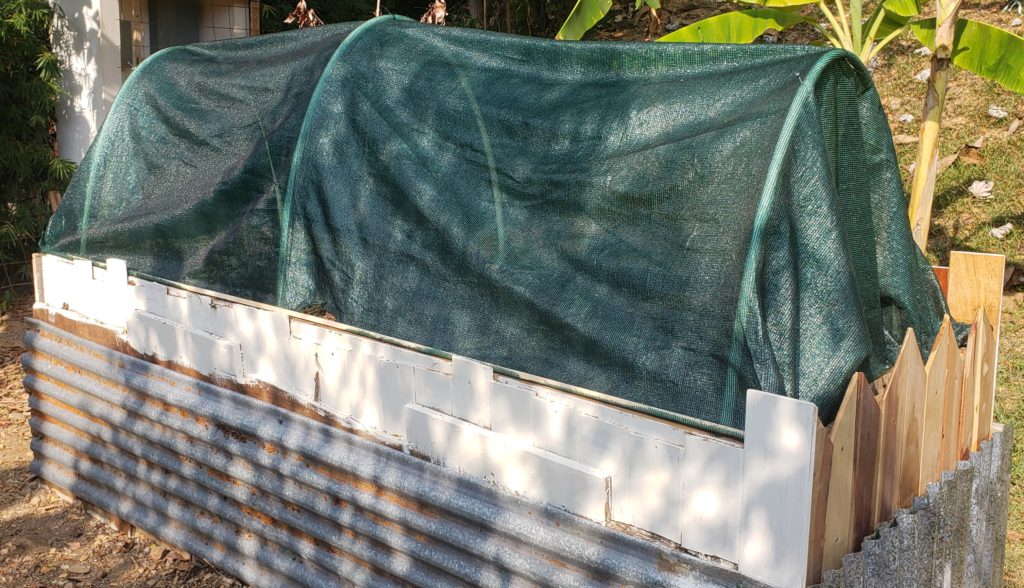
In order to provide additional sun protection, we decided to put a hoop enclosure over the top of the raised garden bed. Fortunately, we were able to source leftover PVC pipe from the property to create the three upside down U-shapes that would give the hoop enclosure structure. I did have to buy the green tarp material from the local hardware store, but it was very affordable, given the money we saved upcycling all the other materials.
The PVC pipes screwed in easily to the wood framework at their base and I simply used Zip-Ties to secure the netting material to the PVC at the three apexes. From there, I used long, thin, leftover trim wood to weight down the two edges of the netting and secured the ends in place using small, 1/4-inch screws.
Update: One of the long, thin pieces of trim that I used has since snapped and is currently in need of replacement. If you can get your hands on something a bit more durable, I’d certainly recommend it!
Step 7: Plant Your Favorites!
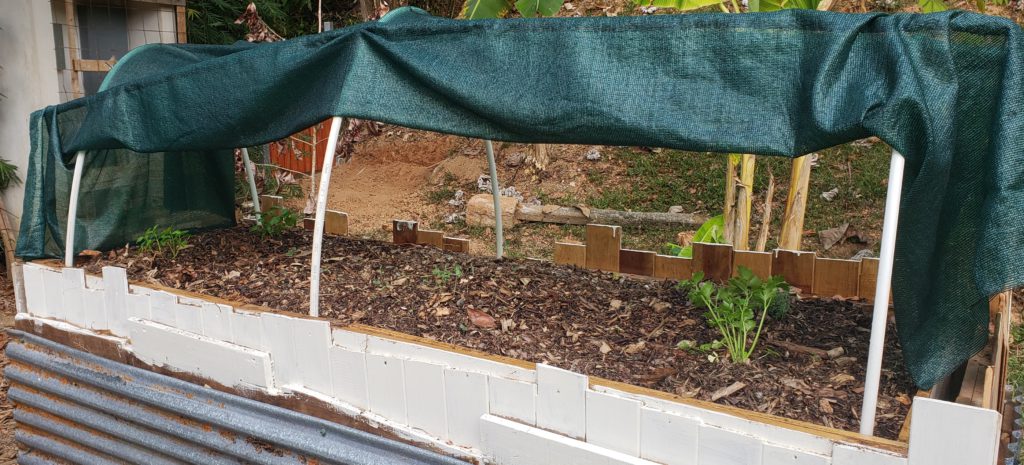
And now you can plant your favorites! We picked up starters of celery, curry, basil, and spinach at the local farmer’s market for our raised garden bed. After almost a month and with regular watering, the spinach is the only one of the four that really seems to be thriving here. The celery and basil have been picked clean by ants or other small insects (which the netting was supposed to keep out) and the curry hasn’t shown any real signs of either improvement or degradation.
In addition to these four, a number of papaya and watermelon starters have popped up in the middle of the raised garden bed. These seedlings are the product of our use of the compost material in the final layering of the raised garden. While we don’t mind them coming up, the papaya will have to be pulled long before they can begin to bear fruit. Fortunately, we have many other papayas started on the property (in more ideal locations) and we can actually harvest the young papaya leaves and juice them for a liver cleanse. This juice can also be helpful in preventing tropical diseases like malaria and dengue.
The Slow Life Guides

We hope you enjoyed this post detailing our process for how to upcycle a raised garden bed. I want to take a minute to thank Self Sufficient Me for the inspiration for this creation process. Your video from Season 1, Episode 1 of Growing Food in Small Spaces was a huge help in us bringing our vision for a raised garden bed into reality!
When we wrap up our time here in Costa Rica, we will be moving back stateside for the foreseeable future. After a spring road trip and some time in Lake Tahoe for the summer, we will be settling in Santa Cruz, California for the next four years as Katie pursues her degree in Traditional Chinese Medicine.
We would love an opportunity to help manage another Airbnb and work on property improvement projects like this one! If you’re interested in speaking to us about such an arrangement, shoot us an email to tucker@slowlifeguides.com or katie@slowlifeguides.com. We love the idea of leaving places better than we have found them and know that we can provide considerable value for the right property owner. If that’s you, we look forward to hearing from you!